Aquatic Knowledge
How to Make Filter for Aquarium: DIY Guide for Crystal Clear Water
Creating a homemade filter for your aquarium is a fun and practical way to ensure your tank’s water stays clean, healthy, and balanced. Not only can it save you money, but it also allows for customization based on your aquarium’s needs. In this guide, we’ll explore how to make filter for aquarium step-by-step, the different filtration types, and how to maintain your filter to keep your aquatic environment thriving.
Understanding Filtration Types
Each filtration type plays a crucial role in keeping your aquarium environment balanced and healthy. A well-designed filtration system combines all three types—mechanical, biological, and chemical—providing a thorough cleaning process that maintains water quality. Let’s dive into each filtration type and understand their specific functions.
Mechanical Filtration
Mechanical filtration is the first line of defense in any aquarium setup. It works by physically removing solid waste and debris from the water. This includes particles such as uneaten fish food, plant debris, and fish waste. The most common materials used for mechanical filtration are foam sponges, filter pads, or filter floss.
These materials trap large and small particles, preventing them from floating in the water and causing cloudiness. A good mechanical filter ensures water clarity by allowing clean water to flow through while holding back debris. However, it’s important to regularly clean or replace these filter media, as they can become clogged over time, reducing their efficiency.
Biological Filtration
Biological filtration is arguably the most vital filtration type for any aquarium. It’s a natural process that relies on beneficial bacteria to convert toxic substances like ammonia and nitrite, both of which are harmful to fish, into less toxic nitrate. This process is known as the nitrogen cycle and is essential for a healthy aquatic environment.
Porous materials such as bio balls, ceramic rings, or sponge filters are often used in biological filtration. These materials provide ample surface area for beneficial bacteria to colonize and thrive. As the water passes through, these bacteria break down harmful toxins, keeping the water safe for your fish.
Chemical Filtration
Chemical filtration takes care of dissolved toxins, chemicals, and other impurities that mechanical and biological filtration can’t remove. It typically uses specialized media like activated carbon, zeolite, or resins to absorb harmful substances from the water.
Activated carbon, for example, is highly porous and can trap dissolved organic compounds, which can cause bad odors, discoloration, and even chemical contamination from medications or treatments used in the tank
Choosing the Best Filtration Media

The success of your filter depends largely on the filtration media you use. Here are a few commonly used materials:
Foam Sponges for Mechanical Filtration
Sponges are excellent for trapping debris. They come in different pore sizes to capture large or small particles. When dirty, they can easily be rinsed and reused, making them a cost-effective choice for mechanical filtration.
Activated Carbon for Chemical Filtration
Activated carbon is used for chemical filtration, as it removes dissolved organics, toxins, and odors. It’s especially useful if your tank water becomes cloudy or if you need to eliminate any chemicals after treating your fish.
Bio Balls for Biological Filtration
Bio balls or ceramic rings are fantastic for biological filtration. They provide a massive surface area for beneficial bacteria to colonize, ensuring your tank’s nitrogen cycle remains stable.
How to Make Filter for Aquarium

Building an aquarium filter from scratch might seem daunting at first, but with the right guidance and materials, it’s a manageable project that will ensure your fish enjoy clean, healthy water. This DIY filter can be customized to suit the needs of your specific tank size and fish species, offering a cost-effective alternative to store-bought filters.
Choosing the Right Filter Type for Your Tank
Before you begin building, it’s important to select the appropriate filter type for your tank. The best filter depends on the size of your aquarium and the type of fish you keep:
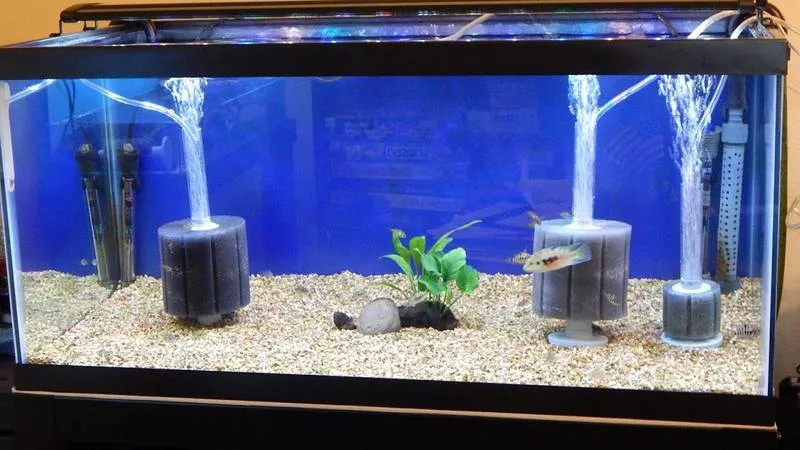
Sponge Filters: Ideal for small tanks and delicate fish like fry or shrimp. They provide gentle filtration and are simple to build.
Canister Filters: Suitable for larger tanks that require more powerful filtration and better water flow control. They can handle higher volumes of water and are ideal for aquariums with larger fish.
For small or medium-sized tanks, a sponge filter or a simple DIY filter system will work well. If you’re working with a larger tank, consider a DIY canister filter to ensure optimal water circulation and filtration.
Materials Needed for a DIY Aquarium Filter
Before you begin, gather the following materials to build your filter:
- Foam sponge or filter pads (for mechanical filtration)
- Bio balls or ceramic rings (for biological filtration)
- Activated carbon (for chemical filtration)
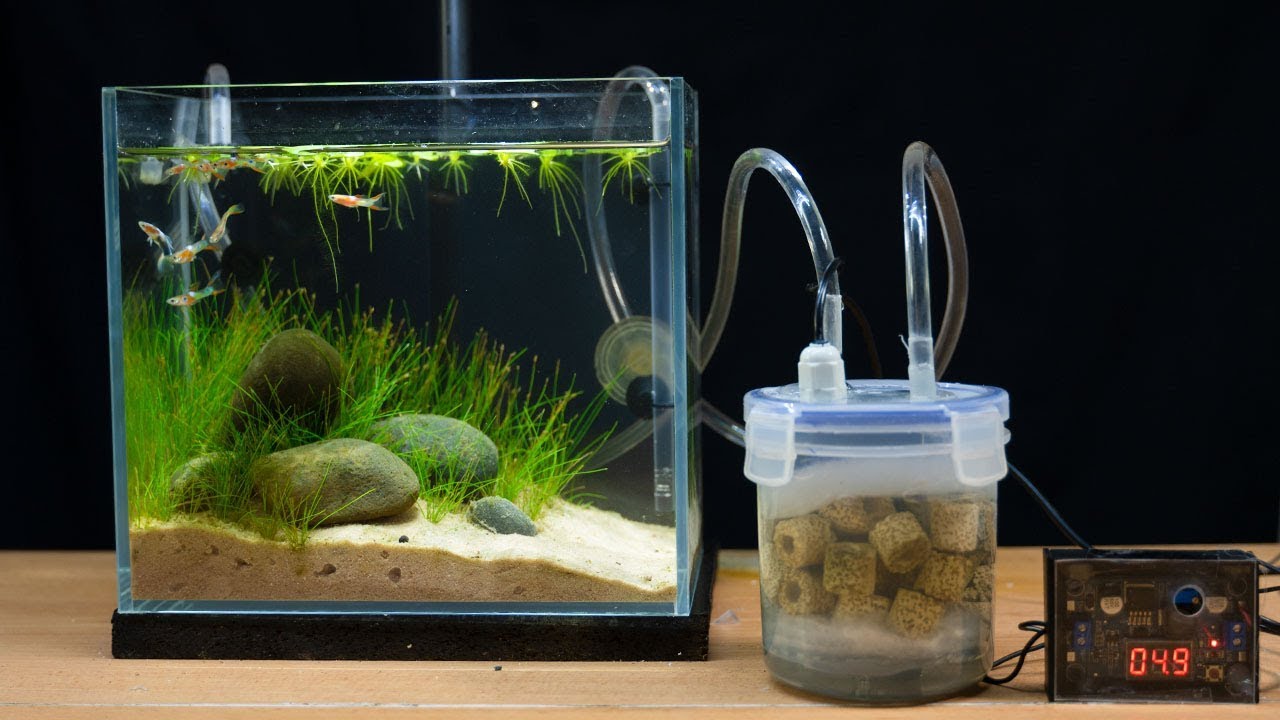
- Plastic container or bottle (to house the filter media)
- Plastic tubing
- Air or water pump
- Drill or small knife (to create holes in the container)
These items are readily available at most aquarium or hardware stores and will form the base components of your DIY filter.
Step-by-Step Instructions for Building Your Filter

Prepare the Container
Start by selecting a plastic bottle or container with a secure lid. This will serve as the housing for your filter media. Drill several small holes around the sides and bottom of the container. These holes will allow water to flow into the filter, but make sure they’re small enough to prevent fish or large debris from entering.
Add Mechanical Filtration
At the bottom of your container, place a piece of foam sponge or a cut-to-size filter pad. This will act as your mechanical filtration, trapping debris, uneaten food, and waste particles from the water. The mechanical filter ensures that larger particles don’t clog the biological or chemical stages of filtration.
Add Biological Filtration
Next, add a layer of bio balls or ceramic rings above the foam sponge. These materials offer a large surface area for biological filtration, providing a habitat for beneficial bacteria. These bacteria are essential for breaking down harmful ammonia and nitrites into less harmful nitrates, helping to maintain a stable nitrogen cycle in your aquarium.
Add Chemical Filtration
The top layer of your filter should be activated carbon or another type of chemical filtration media. Activated carbon helps to remove toxins, chemicals, and unwanted substances from the water, ensuring it remains clean and odor-free. This stage is optional but can be beneficial, especially after treating your tank with medications.
Connect the Pump
Attach plastic tubing to the air pump or water pump and connect it to the filter. The pump should be powerful enough to move water efficiently through the filter media. In most cases, an air pump will suffice for smaller tanks and sponge filters, while larger tanks may require a water pump for stronger circulation.
Place the Filter in the Tank
Submerge the filter inside your aquarium, ensuring it’s positioned securely. Once in place, turn on the pump and check that the water is flowing through the filter as intended. You should see the water being drawn into the filter through the holes, passing through the mechanical, biological, and chemical layers before exiting back into the tank
Tips for Optimizing Your DIY Aquarium Filter
- Size your filter media appropriately. For larger tanks, you’ll need more bio balls and a thicker sponge to handle the higher water volume.
- Monitor water flow. Ensure your pump is moving water through the filter at a steady rate. Too much flow can stress your fish, while too little can reduce filtration efficiency.
- Clean and replace filter media regularly. The sponge or filter pad will need to be rinsed periodically to remove debris, and the activated carbon should be replaced every few weeks to maintain its effectiveness.
Conclusion
Building your own filter is a rewarding project that provides you with a customized solution for maintaining clean and healthy water in your aquarium. By understanding the different filtration types, choosing the right materials, and maintaining your homemade filter, you’ll ensure your fish enjoy a pristine environment.
FAQs
How often should I clean my DIY aquarium filter?
It depends on the filter type and tank conditions, but most DIY filters require cleaning every two to four weeks.
Can I use household items to make a filter?
Yes, but ensure they are aquarium-safe and free from harmful chemicals. For example, avoid regular sponges or metal parts that could rust.
What size tank can a homemade filter handle?
A homemade filter can handle any tank size, but larger tanks may need more powerful pumps and larger filtration systems.
How do I know if my filter is working properly?
Check for clear water, proper flow, and healthy fish. You should also monitor water parameters like ammonia and nitrate levels.
Is it safe to use a DIY filter for sensitive fish species?
Yes, as long as the filter is designed to provide gentle water flow and avoid harsh currents, it can be safe for sensitive species.
